
Best Cabinet Staining Services in Palm Beach County
Free Quote

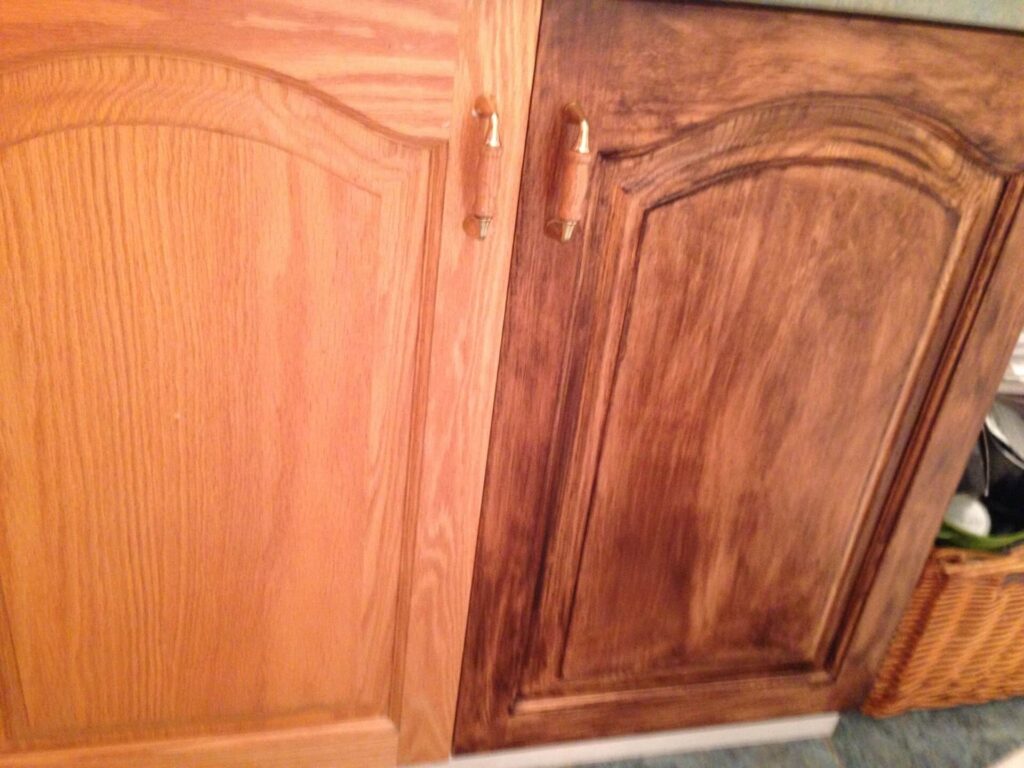
How you prepare and stain your kitchen cabinets depends on your starting point. You could be building your own cabinets, have unfinished cabinets that are waiting for installation, have already installed cabinets that need staining, stripping the cabinets and refinishing or re-staining them, or you are just trying your hand on re-facing. You will prepare the cabinet and stain it a bit differently for all the above situations. There are some basic supplies and steps that are universal when working in cabinet staining. These include;
1. Remove Hardware, Drawers, Doors, and Lay Flat
Staining is a simple task when building cabinets. You can stain everything and apply a finish on it before putting everything together. If the cabinets are pre-built, try removing as much hardware as you can. It is easier to put back the hardware than trying to clean it later on. You can number the hardware to avoid confusion when returning the pieces to their respective places.
Remove the drawer and doors before you begin to stain the cabinets and if possible, lay them flat. When the items lie flat, the stain and finish will not run over and create a look that is unimpressive. You don’t want to put a lot of effort, time, and work into staining kitchen cabinets and then have a finished product that looks unprofessional and sloppy. Palm Beach Home and Remodeling Contractors deliver a job that has a professional and beautiful look.
2. Look the Pieces Over and Sand Them
When staining cabinets, you need to look over the pieces that you want to stain. Some of them may require sanding first. If they are already sanded first, you may just have to sand a few areas that resulted from installing the cabinets or handling them. You need to use a fine-grit sandpaper and you can sand marks after staining your kitchen cabinets. However, it is recommended to do the sanding job initially because doing it later consumes a lot of time.
3. Setup the Area
Safety should come first as you set up the area that you will be used to stain the cabinets. If you have sawhorses, it is a brilliant idea to stain your items on them. You can also use a sturdy bench or table that is close to waist high. Use cardboard or drop cloth on the floor or any other area that you don’t want the stain to go on. You can use acetone or lacquer in wiping up the stain even though it doesn’t work perfectly. The fumes of these products should not get on your hands and you should not inhale them. Mask off the parts of the cabinet that you don’t want the stain to get on such as the interiors. Wear shoes and clothes that you won’t mind getting dirty or you can go for a full-body apron.
The most important thing that you need to put into consideration is your safety. Beware of the dangerous fumes because even a dusk mask will do very little about it. Use a respirator face mask to enhance safety and make sure the working area is well-ventilated.
4. Stain Application
Once you have prepared your working area, open the stain can, and stir it well. It is a point that we cannot overstate it enough. When the can sits for a very long period, the stain separates and the sediment or color sits at the bottom of the can. Without stirring, the stain that you apply from the top will be lighter than the one that is at the bottom of the can. As a result, you won’t really have nice-looking results. The first areas you stain will be lighter than the last ones. Remember you need even results when applying the stain.
Old carpet remnants are among the best pieces to use in applying the stain. Cut them in rectangles of approximately 4 X 3 inches. Dip one end of the carpet in the stain and rub the carpet on the wood. At this point, you can either go with or against the grain but make sure you cover all the surfaces. When handling intricate works like raised panels or doors that have groves, make sure there are stains in all the corners. At this point, it is good to overstain as you will wipe out any excesses. The process can get messy hence it is recommended to wear an apron. Make sure you don’t miss out on any spots as you stain the piece. Some of the areas that are commonly missed are the corners, drawer edges, and grooves.
5. Wipe the Stain Off
The mistake that most people make is wiping off the stain immediately. Most stain cans recommend that you allow the stain to sit on your cabinets for about 10 minutes. Waiting is not bad as it does not change the color of the stain. However, if you are straining already installed cabinets that can’t lay flat, the stain will run over if you let it sit for a long period. Therefore, it is recommended to wipe it as soon as possible.
Some people think that allowing the excess stain to stay for more than 30 minutes will make the surfaces darker. However, it is a false darkening technique because it will be hard to wipe off the pieces properly and remove the smudge. If you choose to wait for ten minutes, do so on all pieces to make sure that you produce consistent results.
Wiping the excess stain comes in two processes. The first step needs you to have so many cotton rags with you. Don’t touch the wood with gloved or bare hands after staining because it will leave a smudge mark. Wipe off all the excess stains without caring about the grain.
The second step entails finishing the staining of your cabinets and you need to peel another clean rag. This time around, go over your wood pieces with the grain this time around. The second rag will take more stain off while preventing the smudge marks. Leaving smudge marks is the greatest enemy to staining. When you follow these steps, you won’t leave any smudges during cabinet staining. Wipe off the cotton rag gently and blend the color in.
6. The Final Step in Staining
You need to set your wood pieces aside to dry. If the pieces are already installed, just allow them to hang there. If you have only stained one surface, just lay the pieces on a flat surface. If the pieces have multiple sides, lay them flat on a thing that allows for the circulation of air like saw horses or a professional staining rack. Places, where the rack or saw horses touch the stained pieces, will leave behind smudge marks. You may need to touch up the side before finishing a dried piece.
Allow air to get to as many sides as possible as the piece continues to dry. You can also allow the fans to run over the section that you are drying. It will allow it to dry faster without hurting the end result. However, don’t allow the funs to run on pieces where you have already applied a finish. Lastly, hang your rags to dry and make sure there is air movement around them. If you bunch wet staining rugs together, they can cause tragic explosions, fire, and even death. Therefore, you need to be extremely careful. The best company to help you with cabinet staining is none other than Palm Beach Home and Remodeling Contractors.
Here is a list of our services you can get at Palm Beach Home and Remodeling Contractors:
Below you can find all 10 cities where we offer our services:

-
Cabinet Staining
-
Commercial Painting
-
Commercial Popcorn Removal
-
Deck Power Washing
-
Deck Staining
-
Drywall Installation
-
Drywall Repair
-
Engineered Hardwood Flooring
-
Exterior Painting
-
Flooring Companies
-
Flooring Contractors
-
Hardwood Flooring
-
Industrial Painting
-
Interior Painting
-
Knockdown Textures
-
Laminate Flooring
-
Laminate Wood
-
Orange Peel Ceilings
-
Patio Staining
-
Popcorn Removal
-
Residential Painting
-
Residential Popcorn Ceiling Removal
-
Sheetrock Repair
-
Smooth Ceiling Finish
-
Solid Hardwood Flooring
-
Tile Installation
-
Wholesale Hardwood Flooring
-
Wood Flooring
-
Wood Refinishing Services
-
Wood Staining

-
Cabinet Staining
-
Commercial Painting
-
Commercial Popcorn Ceiling Removal
-
Deck Power Washing
-
Deck Staining
-
Drywall Installation
-
Drywall Repair
-
Engineered Hardwood Flooring
-
Exterior Painting
-
Flooring Companies
-
Flooring Contractors
-
Hardwood Flooring
-
Industrial Painting
-
Interior Painting
-
Knockdown Textures
-
Laminate Flooring
-
Laminate Wood
-
Orange Peel Ceilings
-
Patio Staining
-
Popcorn Removal
-
Residential Painting
-
Residential Popcorn Ceiling Removal
-
Sheetrock Repair
-
Smooth Ceiling Finish
-
Solid Hardwood Flooring
-
Tile Installation
-
Wholesale Hardwood Flooring
-
Wood Flooring
-
Wood Refinishing Services
-
Wood Staining